
Cyanotype with Anna

Name: Anna
Instagram: @visuallywoven
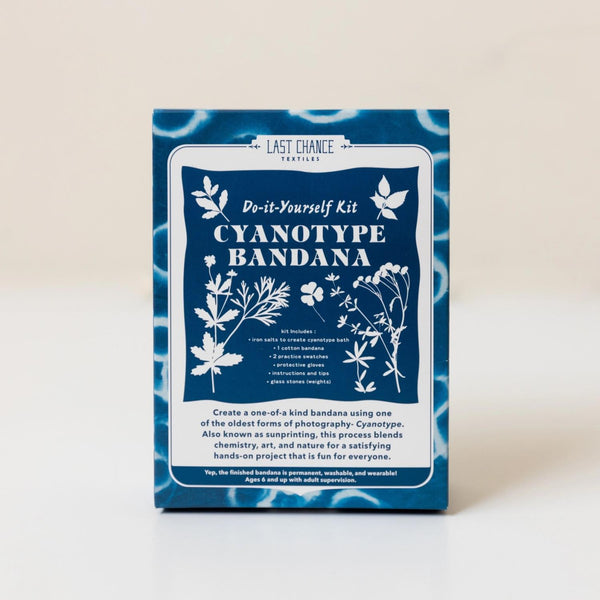
Materials/Kit used: DIY Cyanotype Bandana Kit by Last Chance Textiles
Modifications: None

I was very excited to try out this kit! In the past, I experimented with cyanotype or ‘sunprinting’, which I found really fun and a little magical, I must say. My past prints were created on paper, so I’m delighted to work with cyanotype on fabric, which will allow me to have an item that I can wear (like the cotton bandana included in the kit) or having unique pieces of fabric for further sewing projects (the kit includes two practice swatches).
My tip number one is: do not underestimate the wind!! Even if you don’t feel like the day is windy, the tiny, feather-light leaves will fly away instantly, which can alter, not to say ‘ruin’ your design:)

I would say planning for this project a bit was useful for me to feel prepared. I’ll share some tips that I thought might be helpful in executing your design. However, the kit does include a booklet with instructions, a supply list, and interesting facts about cyanotype.
Honestly speaking, you can’t really go wrong with your design, you’ll always get a unique and beautiful bandana.
I started by planning what I wanted my bandana to look like, and what I would like to use or what I have on hand for sunprinting. Unsurprisingly I chose plants! You could however decide to use other objects, some dry foods or even use photographic images by creating a negative image on a transparent sheet. I wanted to experiment with different shapes, so I used leaves for bigger shapes & grasses for the tiniest little lines, as I do prefer the more delicate flora.
Since the solution for this process is sensitive to light, I worked in a space without much light away from any windows. Ideally you would use a dark room, or a bathroom without a window, however you need to be able to see what you’re doing, especially while measuring the two liquids.
The next little advice is to make sure all your fabric is evenly and throughly soaked with the solution, especially if you use something thicker such as jersey fabric; otherwise it might come out patchy.
Now, for the fun part—designing your pattern! After the fabric is soaked and squeezed, it’s time to lay it out flat.
My recommendation would be to find some cardboard that is bigger than the bandana, which will serve as our portable work surface. I did this part still in the dark area to have some time to decide on placement. After that’s done, our prepared bandana along with our arranged plants is finally sandwiched between the flattened cardboard. I additionally used plexiglass to make sure everything is nice and flat.

Now, expose the bandana. Sit back, and let the sun do its magic! It’s really fun to watch it change color from the bright yellowy-green to dark blue. Putting a timer might be helpful—it should take about 40 minutes.

After the time is up, I covered my piece again with the cardboard and went on to the washing. It’s really exciting to see how the design changes throughout the different stages of the process!!
The most important thing is to have fun and remember that you’ll never get it wrong! 
I hope you’ll try it out!
I can’t wait to wear my new bandana with my t-shirt and jeans uniform. The blue is beautiful and how amazing to know that you captured the plants from this season forever!!
I’m looking forward to making a cyanotype T-shirt and socks!!
Leave a comment